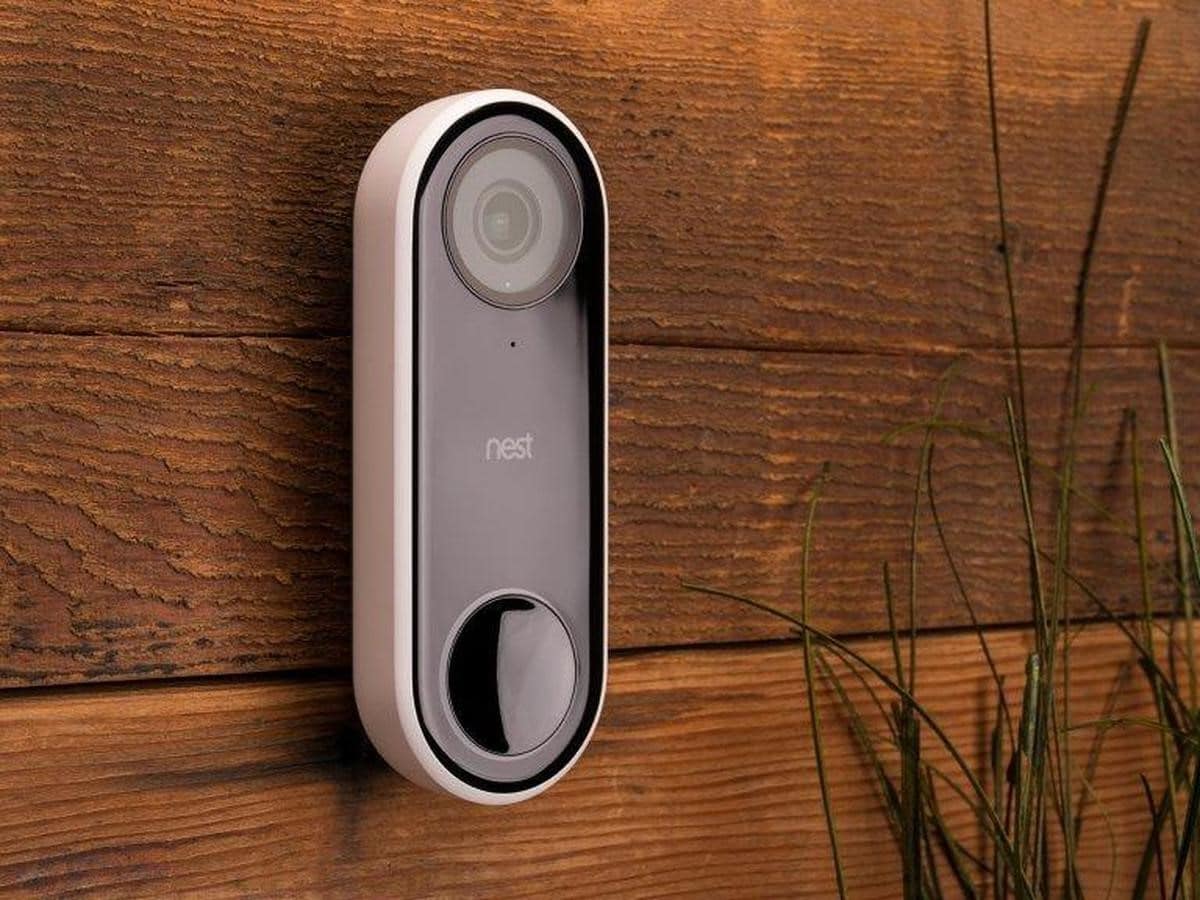
Let us see how to install the Nest doorbell and see if it requires any power supply to function in this blog. Launched in mid-2018, the Nest Hello currently costs $229 on Google’s online store. It is a slim device, roughly measuring about 4.6 X 1.7 X 1 inch with rounded corners.
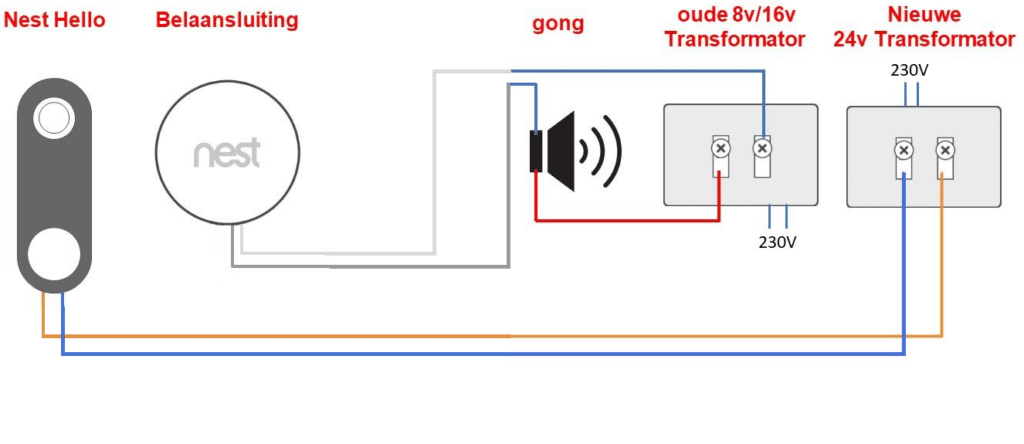
The size is so small that the device does not support an internal backup battery and requires a wired connection. Nest Hello requires about 16 to 24 volts of power. The device requires a chime connector inside the doorbell’s chime box taken from inside the home.
Power Options for Nest Hello
How to install the Nest doorbell? While installation is another task, you cannot forget that the Nest Hello video doorbell has only an electrical wiring power source option. The doorbell adjusts well to the wiring that your previous doorbell used and replaces the front device.
With caution, remove your old doorbell from the wall and remove it, separating it from the electrical wiring. After this, Nest Hello will find a power source to hook up. Connect the same wiring to your Nest Hello doorbell.
Nest Hello utilizes the existing wiring and, once you switch on the power, everything will be on track. Following this procedure is how you install a Nest doorbell. The device swaps positions with your old doorbell and thus enhances the security features of your home.
No products found.
How to install the Nest doorbell?
Cross-check the requirements for proper installation. Turn off the power source and, if you did not have a wired doorbell installed previously, call a technician to install a transformer to install Nest Hello. Cross-check the wiring.
Unscrew and remove the plate from the wall to see the wiring. Check if the doorbell has a system that powers by wiring from inside the wall. If your previous doorbell had an intercom or front gate control system, remember that Nest Hello stops. In such a case, you will need a transformer to install your Nest Hello.
There might be some letters on each of the doorbell wires that exist. They will be T, F, and R to represent Trans, Front, and Rear. All these wires should be suitable before we learn how to install the Nest Hello.
Nest Hello requires a specific voltage to help the device consume the right amount of power. The wires will need an alternating current of 16-24 volts and at least 10 VA to boost the doorbell to its fullest extent.
Voltage will either fry your device or disable its functioning with less power supply. Your transformer might not give you the correct voltage measurements and readings and, if this is the case, check them yourself using a multimeter.
If the voltage measurements range from 14 and 30V, then it is favorable for your Nest Hello. However, if you measure the voltage and the value falls below 14V or above 30V, you will need a new transformer to learn how to install the Nest Hello.
No products found.
Does Nest Hello Need Power?
Nest Hello includes a cable and AC adapter to plug in the power outlet. Though it can connect directly to your existing wiring, it can use an optional indoor power adapter in the United States. Thus, they can constantly stream video instead of using motion sensors.
No products found.
How To Install Nest Hello?
Nest Hello uses a power supply to stream live video and sends notifications. However, night vision LEDs require more power than during the daytime. Even in entire capacity, your Nest Hello won’t use more than 7-9 Watts and, so you can keep it plugged all the time.
How To Install the Nest Hello Without a Chime?
Nest Hello will work without a chime by using an indoor power adapter or a plug-in transformer.
Buy the indoor power adapter from Amazon to regulate the voltage of your device. Moreover, you won’t need a chime connector if you prefer a power adapter. If not, take the connector and follow the steps to install Nest Hello as given below.
- Confirm the suitability of the wiring, test the doorbell and turn off its power.
- Add Nest Hello to the Nest app. You can download it from the Play store.
- Connect the Nest chime connector with the doorbell and replace the existing doorbell.
- Give some time for the Nest Hello update process to complete and test the device.
- Pair the device and connect Nest Hello to Google Home.
How To Install Nest Hello and Connect the Wires Correctly?
Remove the screws of your existing doorbell and take a picture of the existing wiring for reference before disconnecting any wires. You can also wrap the cords around some rounded objects to prevent them from falling.
If your existing doorbell was in some corner, you should use the 15-degree wedge that helps you navigate your field of view either to the left or to the right. Use existing hoes to the maximum and mark any new holes before you learn how to install Nest Hello.
No products found.
How To Install the Nest Hello?
Screw the wall plate to the wall with the logo in the correct position and orientation. You can use the included masonry bit to drill holes at the markings for hard surfaces like brick or stucco.
Insert the wall anchors correctly and, you may even trim down excess or extended wires if they are too long or use optical extensions if they are too short.
Connect the cords to the back of the Nest Hello device and push off the excess wire in the hole. Slide the top of the doorbell in the plate and snap the bottom to finish the setup.
How To Select Compatible Transformers for Nest Hello?
After we have learned how to install the Nest Hello, let us check if the transformer is compatible with the doorbell. If your transformer is 16V or 24V, it fits with the Nest doorbell.
Get the 24V transformer for long wiring runs or, choose a 16V transformer if your wiring is less than 60-80 feet. While the 24V transformer provides more power, you can adjust it with a 16V transformer that will give you enough power unless you have long run, or two doorbells connected to a single switch.
Sometimes, the existing transformer becomes very inaccessible, or the engraving on one of the sides of the transformer wears off. In such cases, it is difficult to determine the voltage. Hence, try and install the Nest doorbell to check if it works.
We have seen earlier how to install the Nest doorbell. If the doorbell does not get enough power, the button blinks yellow. If the doorbell does get enough power, it will show a blue ring around the button. In case of a yellow button, ensure that you replace the transformer to start Nest Hello.
Final Word
Nest Hello does not have an option for internal batteries and relies solely on power through its wires. Additionally, it needs a doorbell transformer with a voltage between 26 and 24 Volts to boost it properly. If the power goes up or down, either the device won’t work or will fry it.