Many old houses have old tile that needs to be removed. This old, cracked tile can cause many problems for your home – from making it difficult to clean the floor underneath to causing health hazards like mold and mildew.
It does not matter if you are old or young; removing old tiles is a difficult task. It can be frustrating and take hours to complete the job. Many difficulties come with this process, but there are also ways to make it easier on yourself! In this blog post, we will discuss the top 10 tips for old tile removal so you can get started right away!
How Hard is it to Remove Old Tile?
It depends on the type of old tile that needs to be removed. Generally, however, old tiles are either glued into place with old adhesive, or they are set in mortar.
Consequently, it may require some serious prying and chiseling to take up old adhesives and remove cement from the tile edges so you can work your way free of cracked old tiles!
Top 10 Tips for Old Tile Removal
Tip #1. Start By Removing the Grout from The Tiles.

Use a screwdriver or old toothbrush to get into the grout lines and loosen up the old adhesive. Once you have loosened it, use either an old putty knife or scraper to remove the old adhesive from both tiles and floor.
Remove all excess glue using turpentine. Make sure that the old adhesive is completely removed. Allow old glue to dry before proceeding with any other steps.
This will make it easier for you when removing old tiles because they will not be stuck together as much and may come up more easily!
Tip #2. Use A Hammer to Break Up the Tiles and Remove Them, Then Use a Chisel or Screwdriver for Stubborn Pieces.
Use a chisel or old butter knife to pry up old tiles after you have removed the old adhesive, hammer away at stubborn pieces, and use your old putty knife again to scrape them off the floor. This may take some time due to how hard it is, but after removing all this old tile, you will have a floor that is much cleaner and will be easier to maintain.
If old tiles are still stuck, use a hammer or old butter knife to loosen them up again before removing them with your old putty knife. Do not forget about the corner pieces! They can often take some extra work, but they are worth it because you will have a more uniform floor.
No products found.
Tip #3. Pour Boiling Water on Any Remaining Adhesive, Which Will Loosen It Up So You Can Scrape It Off with A Putty Knife.
Pour old boiling water on the old glue and use your old putty knife to scrape it off. Be sure not to pour old hot water, or you may risk cracking any remaining tiles! This is a great way of removing old adhesive that has already dried up – if they are still wet, skip this step because pouring old boiling water on old adhesive will make them stickier and more difficult to remove. Use old turpentine or acetone to get the old glue off your old putty knife, too!
No products found.
Tip #4. Wear Protective Gloves and Goggles While Working with Old Tile Removal Because Of Sharp Edges and Chemicals.
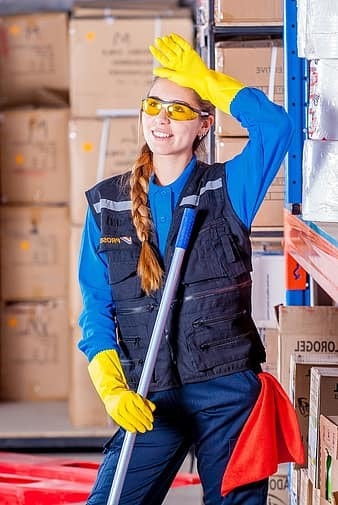
When old tiles are removed, they may have sharp old edges and pieces that could cause injury. Always wear old gloves made for this type of work – preferably those with the fingers cut off so you can do finer tasks! However, remember that tile shards can be very sharp. They are also sometimes hard to detect. In some instances, you only notice the tile shards once they cut your skin or when you see blood from a cut. So fingerless gloves may be out of the equation. Nitrile gloves are a safer alternative. They can protect your hands from scrapes and scratches due to their tear-resistant quality. You also don’t need to worry about hazardous chemicals since nitrile gloves are puncture- and chemical-resistant. Thus, they’re an ideal choice when using tile cleaners and removers.
Be sure also to wear old goggles or safety glasses when using chemicals like turpentine because it is harmful if in contact with old skin or old eyes. It is a good idea to wear old work clothes, too – old jeans and an old t-shirt will do the trick!
No products found.
Tip #5. If There Are Still Some Stubborn Areas That Won’t Come Off Without Breaking, Take an Angle Grinder to Them.
If old tiles are still stuck, use a hammer or old butter knife to loosen them up again before removing them with your old putty knife. If this does not work and the tile is too difficult to remove, an angle grinder may be useful in breaking off the stubborn old glue. Be sure not to run it for long periods of time because the old tile is old and may crack.
If the old adhesive has dried up, an angle grinder can also help you remove it from the floor using old medium-grit sandpaper or steel wool. Be sure not to run this for long periods of time because old tiles are old and may crack! It is best to use safety goggles and gloves when using old tools like this.
Tip #6. Remove Dust Particles Using Either Wet Cloths or Dry Vacuum Cleaner Attachments.
When old tiles are removed, they may have left old dust particles on the old glue. Use either wet old clothes or an attachment from your old vacuum cleaner to clean up these pieces of dirt and remove them after you have finished removing all the old adhesive.
Tip #7. Sweep Away Any Debris Left Over from Old Tiles.
When old glue is removed, there may be old bits of dirt or residue left behind. Use an old broom to sweep up the rest!
After you finish removing all the old adhesive from your old floor, it will be much easier for you to maintain and clean because any spills that happen on the old tiles will not cling onto it so easily.
Tip #8. Apply Sealant If Desired – This Will Protect Against Spills and Stains and Help Keep Out Moisture That Could Lead to Mold Growth.
Apply old sealant if you want to protect your old floor and keep old stains from soaking in. This will also help prevent mold growth, which is important because tile floors are porous – they cannot be sealed as easily! If any old tiles were broken during the removal process, use some old acrylic paint or vinyl adhesive to cover up old cracks.
Remember that old stains should be removed first before sealing them, and this will prevent future staining because once sealed, anything spilled on your floors like Kool-Aid is more likely to stain them. Old sealant works best on old floors and is preferable because old tiles are porous – they cannot be sealed as easily!
Wrapping Up
There are several things to keep in mind when planning your tile removal. First, you should consider the cost, how much time you want to put into it and whether this is something you can do yourself, or if hiring professionals will be necessary.
We hope these 10 tips were helpful for your next project. Let us know how they worked for you in the comments section below!